
Hanging Instructions For Acrylic-Mounted Prints
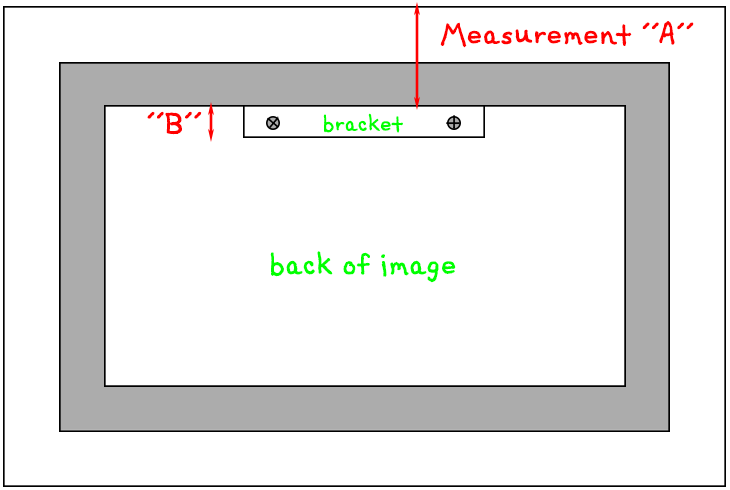
- After finding the right place to hang the image, you could measure from the ceiling to the top of the image. Then you can add the distance from the top of the picture to the inside/bottom of the top bar of the aluminum frame (Measurement A in Figure 1). Finally, add one inch to get to the bottom of the bracket (Measurement B).
- Make a mark on the wall for the bottom of the bracket.
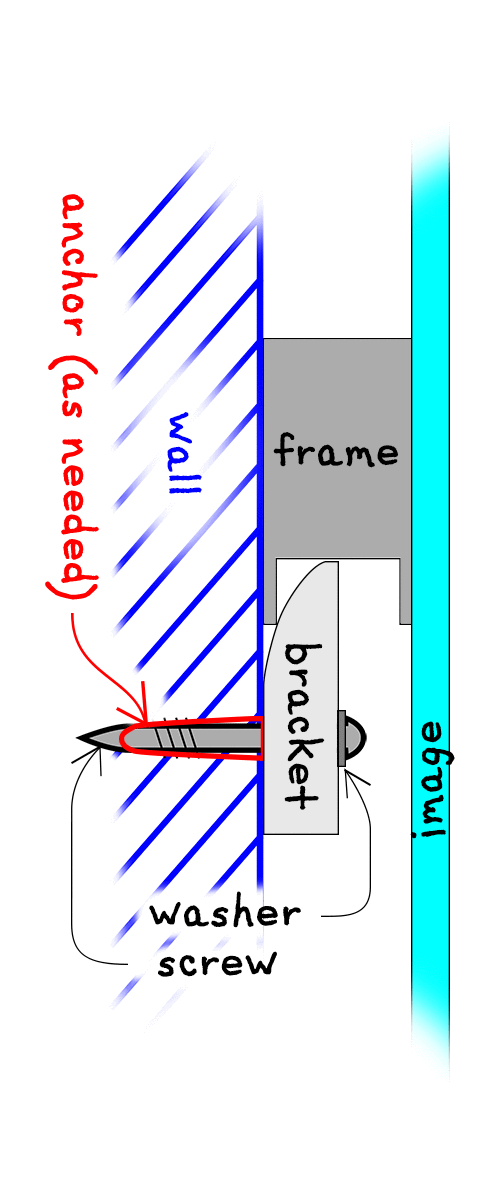
- While holding the bracket with the bottom edge on the line and the curved edge up and toward the wall (as in Figure 2), place one screw in the hole and tap to mark the wall for the drill.
- If drilling in wood, use a 1/8" drill bit; you will be putting the screw directly into the wall and will not be using the red plastic anchor. For concrete, masonry, drywall, and plaster use a 3/16" drill bit. Drill 1/4" deeper than the length of the anchor.
- If appropriate, put the anchor into the hole. Position the bracket over the hole or anchor and tighten the screw until slightly firm, but not tight.
- Level the bracket.
- Put the other screw in the hole and tap to mark position. Drill, insert anchor (if appropriate), and insert and tighten second screw.
- Go back and tighten first screw.
- Hang photograph.
- Congratulations, you are finished. Enjoy; repeat as necessary.
You can contact us if you have any questions, or hit the Comment Button below if you have any suggestions for improvement.