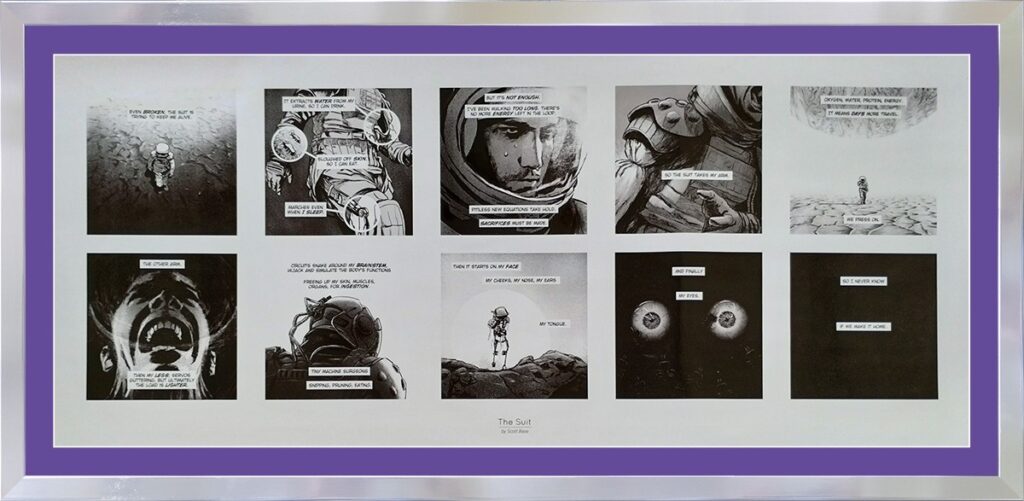
Earlier this year, a friend brought over a friend with a 46½ x 21″ monochrome print of the Scott Base comic strip “The Suit”Link. (I give these details only because the content itself in some ways inspired the final project design.) We discussed possibilities while they were here. After considering the obvious choices of a white or black frame, he decided on 1¼” “stainless steel” (medium-density fiberboard) mouldingDefined1. He agreed to non-glare glass and decided to go with a dark purple matDefined2. The glazing would be the biggest piece I ever used and needed to be special-ordered. The matboard would need to be larger than the standard 32 x 40″. I ordered that. This is the project I mentioned in my recent blog post, “What I Learned About Printing On Matboard“.
Change 1: Moulding Width
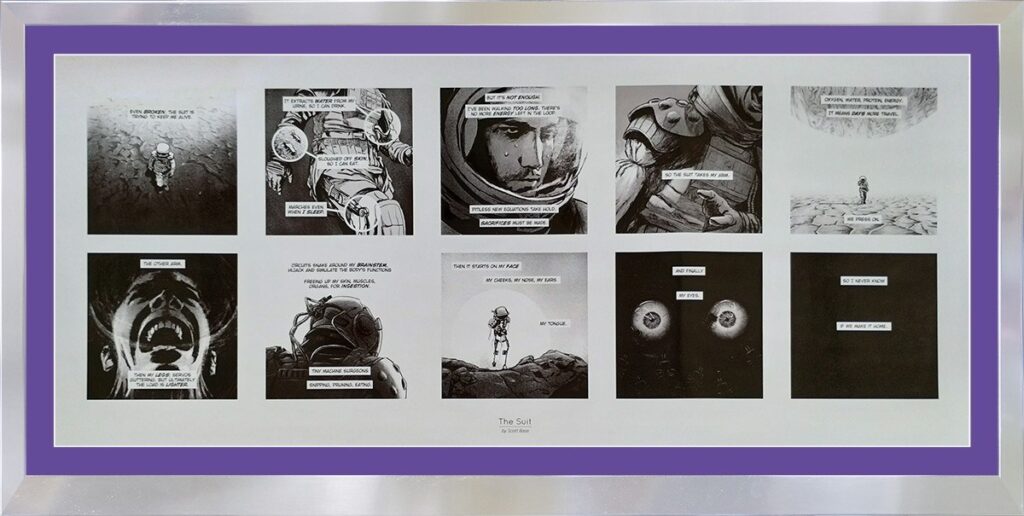
Plan A (shown above) is the project we agreed to that first meeting. All moulding is 1¼”. The mat was the only dark purple mat I could find, Crescent Select 89886 “Dark Purple”. Then I thought that because of the width (and possible weight), it might be better if the bottom moulding were thicker (2″). Hence Plan B. I showed the images of both plans at the same time. The customer liked Plan B but was disappointed in the darkness of the mat.
Change 2: Mat Opening
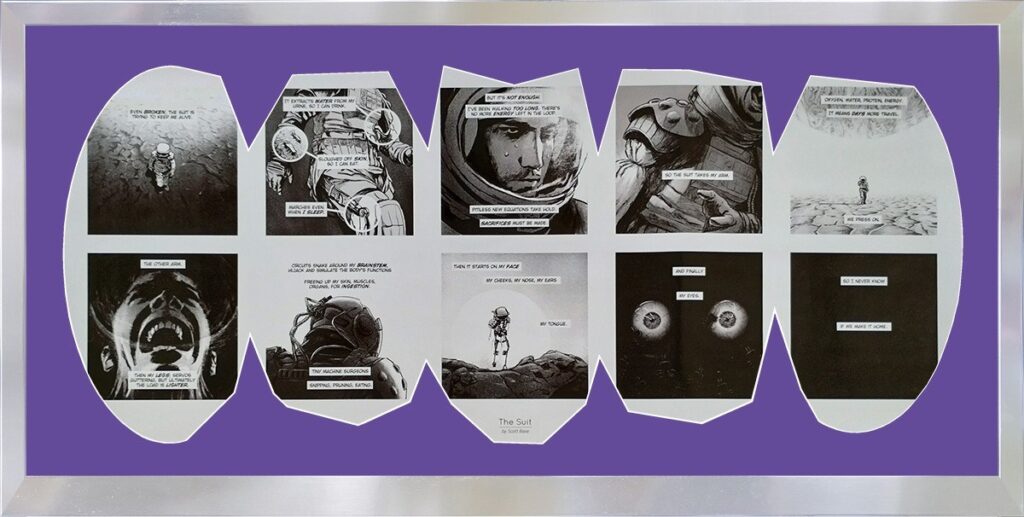
Then I got creative. I offered Plan C with the picture mat preparing to devour the print, not unlike the suit in this comic devoured its wearer. Shown below is actually the second version. The first was cruder, but then it occurred to me that the suit analogy called for something much more refined. Our customer liked it. Plan C, as shown below, is the mat and frame that would be built.
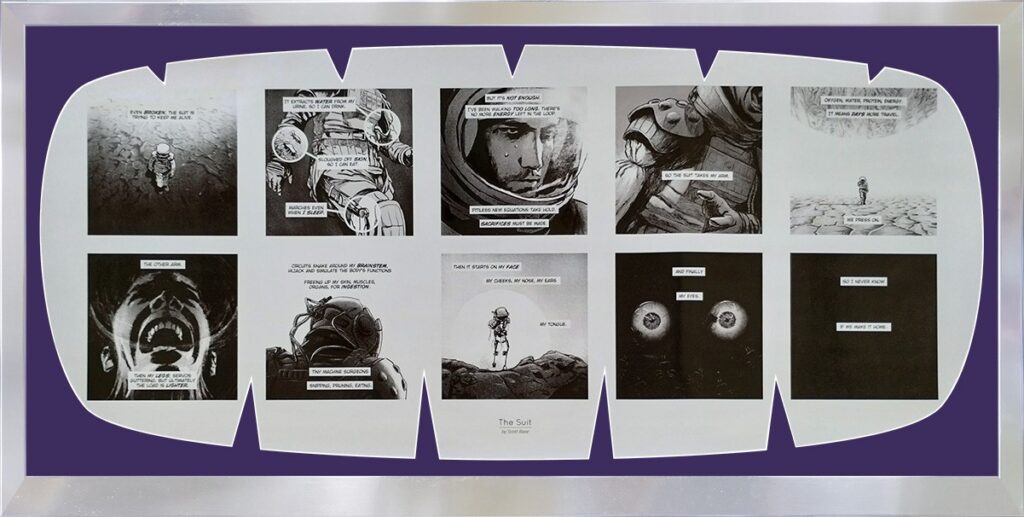
OK, here’s Version 1 of Plan C
The thing is, I’ve never done anything like this before. We have a Logan Model 660 mat cutter for cutting rectangular holes (or at least holes with straight lines and preferably 90-degree angles). We also have their oval & circle mat cutter, but it only cuts openings with up to 20″ by 23″ diameters (and besides, the opening in this project isn’t an oval). At the time, that was it. It was time to do research.
My New ToyTool
After Googling and inquiring on my framer forums, the only viable option for a freestyle mat cutter seemed to be the Dexter Mat Cutter, Model 54150. But I was warned that although it “was a good product”, there was a long and steep learning curve. The instructions that came with it were weak, and there were no Youtube videos. The only real advice came in a comment from Bruce Oudekerk, a longtime photography teacher, to one of the forums in response to someone else’s desperate plea for help. Apparently, based on the evidence, only fools try doing this by hand. Any sensible person would buy a computerized mat cutter (for over ten thousand dollars).
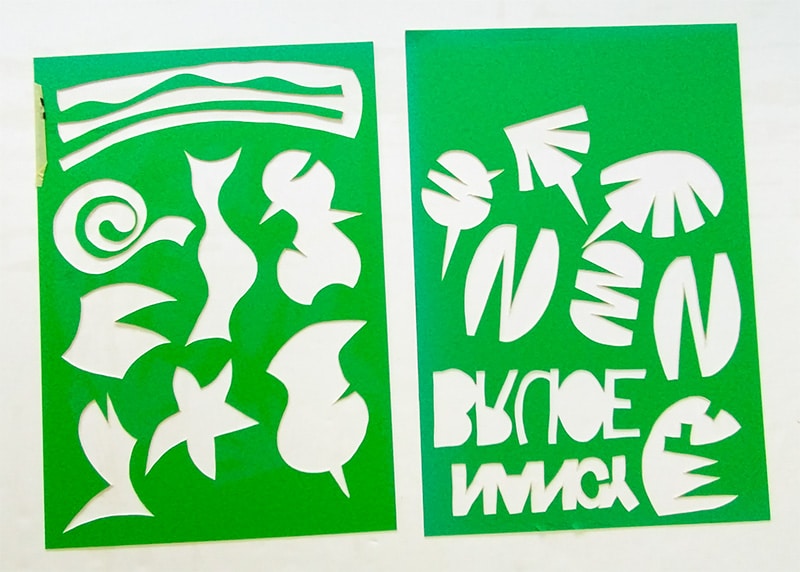
We bought the Dexter mat cutter. I may have misunderstood the instructions because I couldn’t even get the blade to the standard 45° angle without cutting off the top of the blade with our Dremel. I even made a slight design modification to the tool with our grinder while practicing on matboards like those shown in the next Note. Finally, after lots of practice, I was ready.
Here are some of the matboard scraps I went through “perfecting” my technique.
(Because of the dearth of information on this mat cutter, it would be tempting to make my own video or something. But I’m trying to resist adding to my long list of pending promises. Stay tuned.)
Change 3: A Darker Mat
You may also have noticed that the purple in Plan C (above) is darker. That’s more like the color I imagined, and our customer agreed. The problem is, a matboard of that color does not exist, as far as I know.
As discussed in “What I Learned About Printing On Matboard,” I tried printing a darker purple on a white matboard. That didn’t work, because the purple we were looking for was not in the limited color gamut of the matboards I tried. The idea of printing a shade of red on a blue matboard (or vice versa) would have been trickier.
But the idea to print on a red or blue mat never occurred to me at the time. And I had already received the 40 x 60″ Dark Purple mat. Then another idea struck – again inspired by the comics.
Ben Day Dots & Ray Lichtenstein
Ben Day dots, patented in 1879, were a quick and inexpensive way of applying dots and other patterns to show shading and combine colors in mass-printing applications. They were the printing technique of choice when comic books first became popular in America from the 1930s into the 50s. They may have achieved notoriety at the hands of pop artist Roy Lichtenstein in the 1960s.
The Comic Book History. For a more comprehensive view, everything you ever wanted to know about those dots and the early printing methods that preceded them (and the processes that replaced them) can be found at ROY LICHTENSTEIN: THE MAN WHO DIDN’T PAINT BEN DAY DOTS.
Roy LichtensteinAbout parodied Ben Day dots in his paintings in the 1960s. Ben Day’s dots were small and an inconspicuous way to bring shading and color options. Roy’s were large and very conspicuous. For what it’s worth, his 1962 painting “Masterpiece”About sold for $165 million in 2017.
As early as the 1950s, Ben Day dots were already being refined and replaced. For the record, there are no Ben Day dots on the subject comic strip by Scott Base.
The Plan
The idea was to darken the purple by printing an array of black dots on my purple mat. (Regardless of the color gamut, black is hard to mess up.) I had already opened up the page of the .pdf file of the Crescent Select catalog that had “Dark Purple” into Photoshop and used the Eyedropper Tool to find its RGB values (Red:76, Green:61, Blue:129). I then used those numbers to make a new solid color fill layer representing the mat in the images for Plans A and B above.
Now I made a Curves adjustment layer and clipped it (so that it would only affect) the mat layer. I lowered the upper right end of the histogram line straight down from (Input:255, Output:255) to darken the purple until I was happy with the color. (This is similar to the “Flatten whites” section of Jessica McGovern’s article Curves in Photoshop: The 10 Basic Adjustments. (It would be the 4th of the 10 adjustments)). Bringing it to (Input:255, Output:160) would mean that I only wanted about 160/255 of the purple light that I’m getting now. This means the black dots need to cover the other 95/255 of the existing purple area.
The Math: Dot Coverage

As you can imagine from the above diagram, the whole dotted plane could be tiled with equilateral triangles like the one partially shaded in blue above. The area of that triangle, AT, with a side length of 1, would be ½ x base x height or \( \frac{1}{2} \times 1 \times \frac{\sqrt{3}}{2}. \)
The area covered by dots, AD, would be the three unshaded corners of that triangle. Altogether, they are equal to half of a dot. AD would then be \( \frac{\pi R^2}{2} \)
The proportion of total space covered by dots would then be:
\( \frac{A_D}{A_T} = \frac{\frac{\pi R^2}{2}}{\frac{\sqrt{3}}{4}} or \frac{2 \pi R^2}{\sqrt{3}} \)
Since our desired coverage was 95/255, then \( R^2 = \frac{95 \sqrt{3}}{2 \pi 255} \)
which boils down to R ≅ 0.320466.
By counting a row of dots in Lichtenstein’s “Sleeping Girl”About for a known fraction of the 36 x 36″ painting, I estimated that his dots were 7/16” apart (center to center). Based on the math in the Note above, the diameter of our dot, with the same7/16” spacing, would be 7/16 x 0.320466 or just over ¼”. But in our case, being noticeable is the secondary objective for our dots. Our prime objective is to make a darker purple. Lichtenstein’s dots turned out to be too big to be able to create that illusion at normal viewing distances. I Scaled down to half that size (which doesn’t affect the proportion of the area covered by the dots). But I thought those dots were too obscure. As with Goldilocks, the third choice was just right.
Putting It All Together
The frame went together pretty well using the techniques discussed in Using Multiple Moulding Widths In One Frame. I did use my new Incra MITER1000SE Miter Gauge on the table saw (instead of using the miter saw as described in the article). And since one of the examples in the article joined 2″ moulding with 1¼”, I didn’t even have to do the math.
Since I had to order the glass, I let Miami Decor cut it also (48″ by 22½”). They had trouble getting the glass I ordered, so wound up giving me acrylic instead.
I printed the chosen array of dots on the matboard. And since I had already set up separate layers in Photoshop for both the purple mat and white mat edge to produce Figure 3, it was easy to create another black mat edge layer that I could flip and print on the back of the matboard for a mat cutting line. Printing the array of dots on the 40″ by 60″ matboard, I barely gave myself enough ‘bleed’ to do that. (I’m using the term ‘bleed’ loosely, but you can find a decent explanation of the term at PackMojo.) I’d suggest up to two inches on each mat edge, mainly so you don’t have to be so precise measuring margins and such when you print the mat opening outline on the back. For us, that would mean printing a 52″ by 26½” array of dots.
The hole-cutting could have been a little smoother but was completed without incident.
Results
|
|
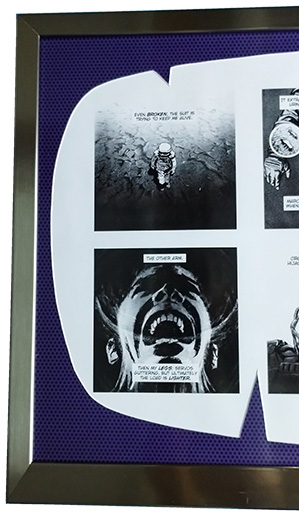
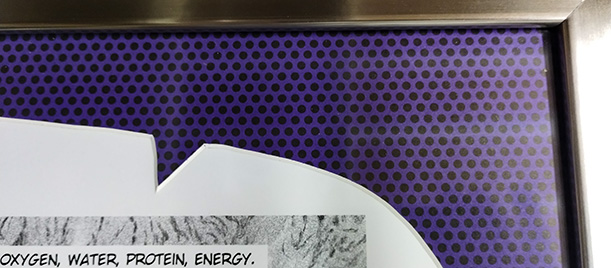
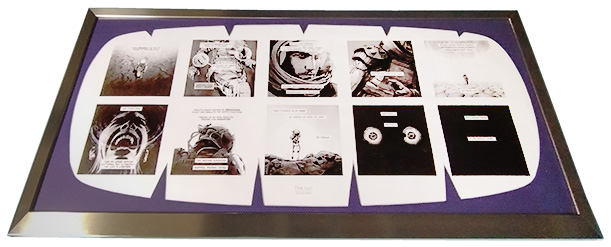
Figure 6 shows the finished product. From that distance, the mat looks like a flat dark purple (just like Figure 3). Moving a little closer, Figure 4 shows the left side of the frame. You can start to notice the dots. Figure 5 shows an even closer view of the upper right corner. It shows the dots really well (as well as other details). That’s the effect we were hoping for. The customer was pleased with the results and we all lived happily ever after.
If you have any questions, or suggestions on how to improve this article, add a comment below. If you want to know what sort of services Bee Happy Graphics provides, check out our Services page. Thank you for reading this far.
Leave a Reply